Introduction
Fashion design is a creative and dynamic art form, combining aesthetic sensibilities with technical skills. The ability to sketch fashion designs is an essential skill for any aspiring fashion designer, as it allows them to translate their ideas onto paper before turning them into tangible pieces of clothing. Sketching is the first step in visualizing concepts, experimenting with shapes, silhouettes, and details, and ultimately presenting a vision for a garment or collection.
Whether you are a beginner or looking to refine your skills, understanding the fundamentals of fashion sketching is crucial. This guide will take you through the essential steps in starting fashion sketches, from mastering the basics of fashion illustration to understanding proportions, tools, and techniques. With practice, you will be able to bring your ideas to life and create designs that are both artistic and functional.
- Understanding Fashion Sketching
What is Fashion Sketching?
Fashion sketching is the process of drawing clothing designs to visualize concepts, explore garment construction, and showcase a designer’s ideas. It is a versatile tool for designers to express their creativity, working through color, texture, and silhouette before moving to the final creation. Fashion sketches can be used for mood boards, presentation boards, collections, or simply for the designer’s own development.
Fashion sketching has evolved significantly, but at its core, it remains a creative outlet for design ideas, helping designers communicate with pattern makers, seamstresses, and clients. Today, fashion sketching includes both traditional pencil and paper methods as well as digital design programs.
The Importance of Fashion Sketching
Fashion sketching serves several key purposes in the design process:
- Visualizing Concepts: Sketching allows designers to experiment with different shapes, silhouettes, and fabric choices before creating a garment.
- Problem-Solving: It helps solve challenges related to construction, fit, and proportions.
- Communication: Designers use sketches to communicate their ideas to others in the fashion industry, including manufacturers, clients, and collaborators.
- Building a Portfolio: As a designer, your sketchbook or digital sketches form an important part of your portfolio, which showcases your style, technique, and creative process.
- Tools and Materials for Fashion Sketching
Before starting to sketch, you need to gather the right tools. While fashion sketching can be done with various materials, beginners often start with simple pencils, paper, and erasers. As you advance, you may experiment with a range of tools and materials to enhance your designs.
Essential Tools for Beginners
- Pencils: Start with a good set of pencils, including soft (e.g., 2B or 4B) for shading and harder pencils (e.g., 2H) for fine details and outlines. Pencils allow for easy adjustments and blending.
- Paper: Fashion sketching requires smooth paper that can hold fine details. Choose lightweight sketch paper or markers for clearer lines and cleaner rendering.
- Erasers: A kneaded eraser is useful for adjusting light areas or making subtle corrections. Regular erasers are also important for cleaning up stray lines.
- Rulers and French Curves: These tools are essential for drawing straight lines and curves, especially when refining proportions and garment details.
- Colored Pencils, Markers, and Watercolors: While sketching is initially about shape and design, color brings your ideas to life. Markers and colored pencils are commonly used to add color to fashion sketches, helping to express fabric texture and mood.
- Fashion Templates or Croquis: A croquis is a sketch of a figure used as a base for drawing garments. Many fashion designers start with a croquis to maintain consistency in body proportions.
Digital Tools
- Adobe Illustrator/Photoshop: For more advanced designers, digital tools allow for cleaner, more polished sketches and are widely used in fashion design.
- Procreate or Autodesk Sketchbook: For tablet users, these apps offer a platform for creating digital sketches, mimicking pencil, paint, and marker effects.
- Graphic Tablet: A graphic tablet allows you to sketch directly into software, offering greater control and precision for digital design work.
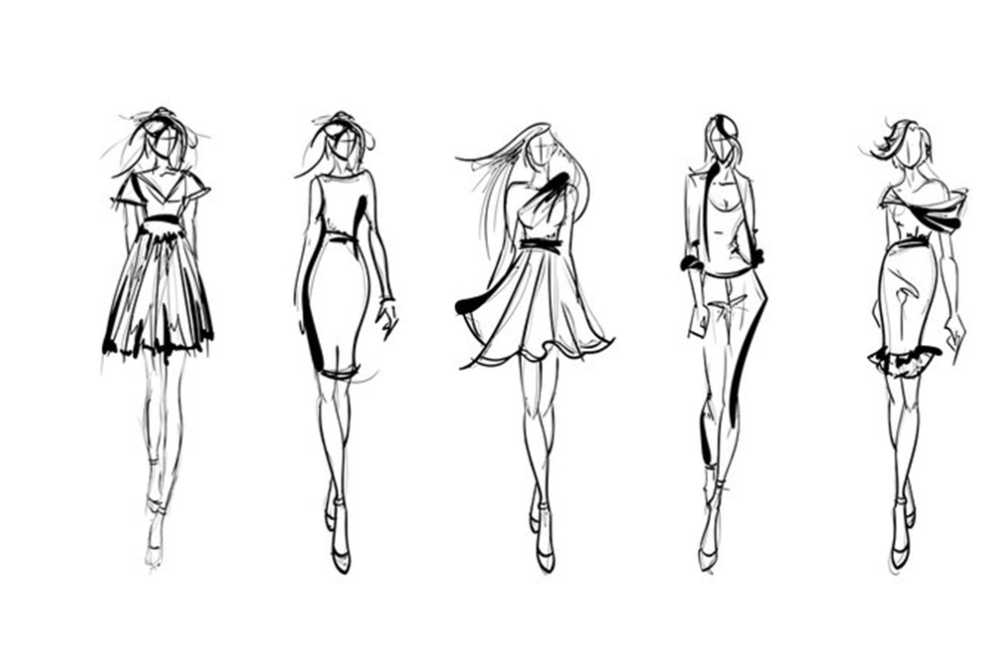
- Fashion Drawing Basics: Proportions and the Croquis
Proportions of the Fashion Figure
Understanding proportions is crucial in fashion sketching because the human figure is depicted in an exaggerated or stylized form. Designers often use a croquis or a template to achieve consistent proportions. The traditional fashion figure is typically drawn in eight heads (the height of the figure is about eight times the length of the head), a system used to elongate the figure and emphasize a certain aesthetic.
In general, the fashion figure is characterized by:
- Long limbs: The arms, legs, and torso are elongated to create a more elegant appearance.
- Small waist: The waist is often exaggerated to create a pronounced hourglass silhouette.
- Narrow shoulders: The shoulders are often drawn with a slight slope, and the overall shape of the figure can be stylized for dramatic effect.
The goal of the croquis is to provide a clear, proportional base for drawing clothing. The figure itself will often have minimal detail (such as facial features and body contours) and is used as a template for sketching the design.
Starting with the Croquis
To create a croquis, follow these steps:
- Draw the head: Start by sketching an oval shape to represent the head. This will serve as the base for your figure.
- Measure the eight-heads system: Divide the length of the figure into eight equal segments. Use these measurements as a guide to sketch the body.
- Sketch the body shape: Lightly sketch the outline of the body, focusing on the shoulder, bust, waist, and hips. Keep the figure in proportion to the head measurement.
- Add limbs: Sketch the arms and legs, keeping them long and slender. The limbs should be in proportion to the rest of the body.
With your croquis in place, you are now ready to begin sketching fashion designs on top of it, experimenting with different shapes and styles.
- Drawing Garments: Sketching Different Styles
Fashion sketching involves translating clothing ideas onto your croquis. As you develop your skills, you will be able to draw different types of garments, from dresses and skirts to coats and pants. Here are some key tips for sketching various styles of clothing:
Dresses and Skirts
- Silhouette: Start by outlining the overall shape of the dress or skirt. Focus on the fit (tight or loose) and the flow (A-line, pencil skirt, etc.).
- Details: Add details like sleeves, necklines, pleats, or hems. Pay attention to the garment’s fabric and its behavior (e.g., flowing fabrics like chiffon will look different than stiffer materials like denim).
- Texture and Color: Use shading to show texture, and experiment with color to represent different fabric types, such as silk, velvet, or cotton.
Tops and Jackets
- Fit and Cut: Draw the overall shape of the garment, paying attention to its cut (e.g., boxy, tailored, fitted). Include any sleeves, collars, or buttons.
- Flow: Consider how the fabric will fall naturally—will it drape or stand stiff?
- Details: Add embellishments, pockets, or decorative stitching that are characteristic of the style you are creating.
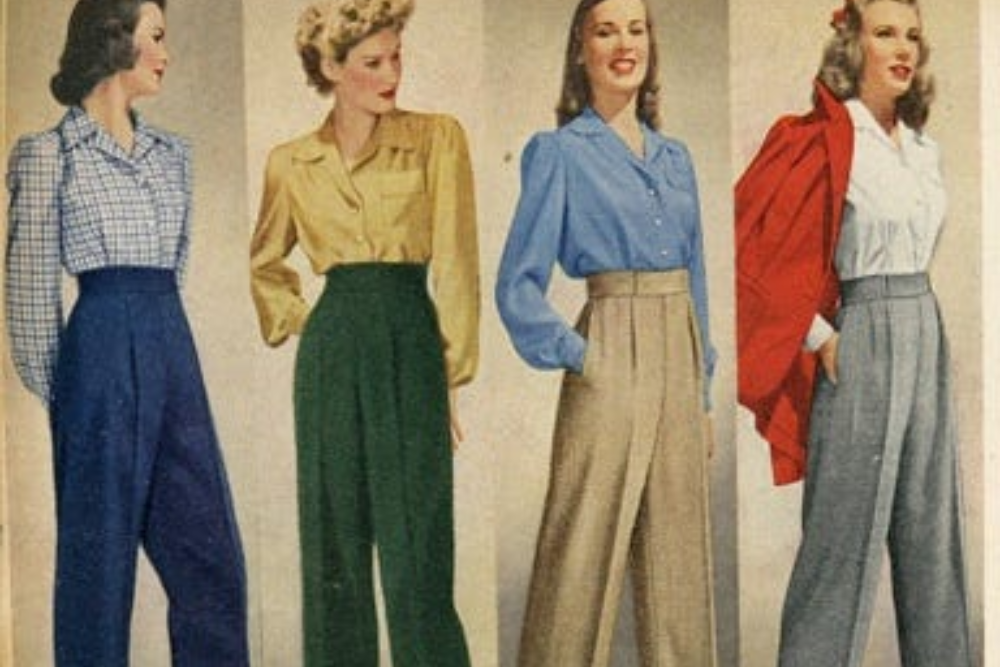
Pants and Trousers
- Leg Shape: Sketch the overall shape of the legs (wide-leg, skinny, cropped) and focus on the fit at the waist and hips.
- Details: Include seams, cuffs, zippers, and pleats. Pay attention to how the pants sit on the figure, especially in areas like the waistband and ankles.
- Adding Color, Shading, and Fabric Representation
Shading and Texture
Once you have completed the basic shape of your garment, it’s time to add dimension to your sketch by incorporating shading and texture. Shading will help convey the drape of the fabric, the movement of the garment, and the light source.
- Light and Dark Areas: Shade areas that would naturally be darker, such as under the arms, around the waist, or where fabrics overlap. Use a pencil to create smooth, gradual shading for a realistic look.
- Fabric Representation: Different fabrics behave in different ways. For example:
- Silk: Has a smooth, shiny surface, so the shading should be soft and fluid.
- Denim: Can be represented with a stiffer look, using sharper lines.
- Chiffon: Use light, airy shading to show the fabric’s movement.
Color
After shading, you can use colored pencils, markers, or watercolors to add color. Start with light washes and build up layers of color. Make sure to match the color to the fabric’s texture and feel, ensuring it complements the overall design.
- Finalizing and Refining Your Sketch
Once you’ve completed your sketch, take the time to refine the details. Erase unnecessary lines, sharpen edges, and adjust proportions if needed. Don’t forget to add any finishing touches, such as buttons, stitching, or decorative elements.
Creating a Fashion Presentation
To present your designs professionally, consider creating a mood board or presentation sheet. Include:
- Multiple views of the garment (front, side, and back).
- Color swatches or fabric samples.
- Notes on the design (such as fabric choices, inspiration, or fit).